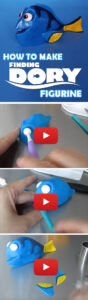
Hey everyone! Here’s a new figurine tutorial. In this video, I’ll show you step by step how to make a Dory figurine cake topper. Enjoy 🙂
If you want to save this, pin it!
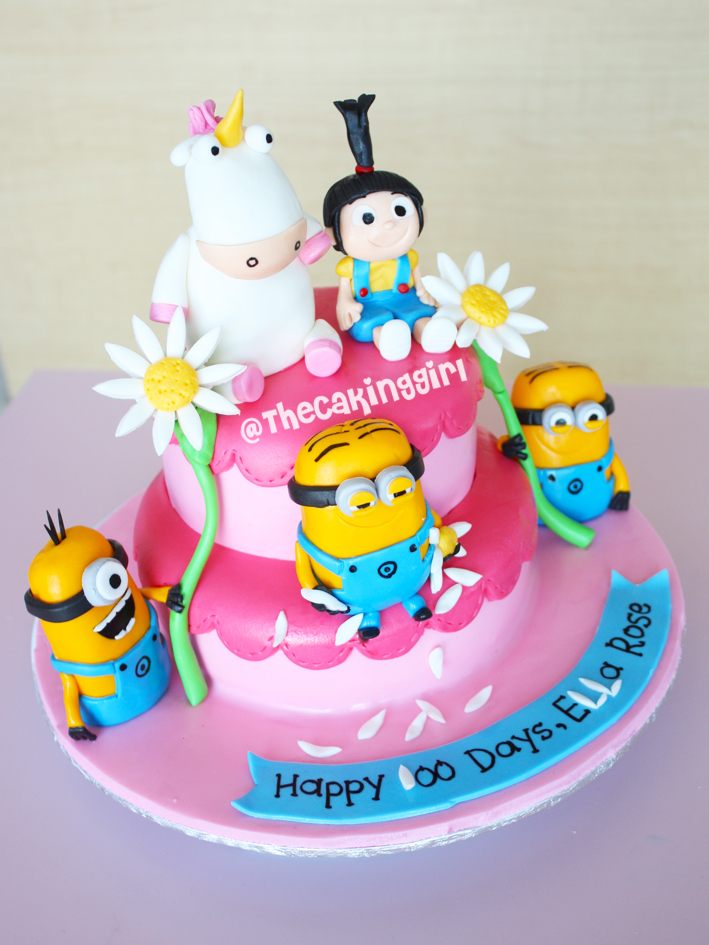
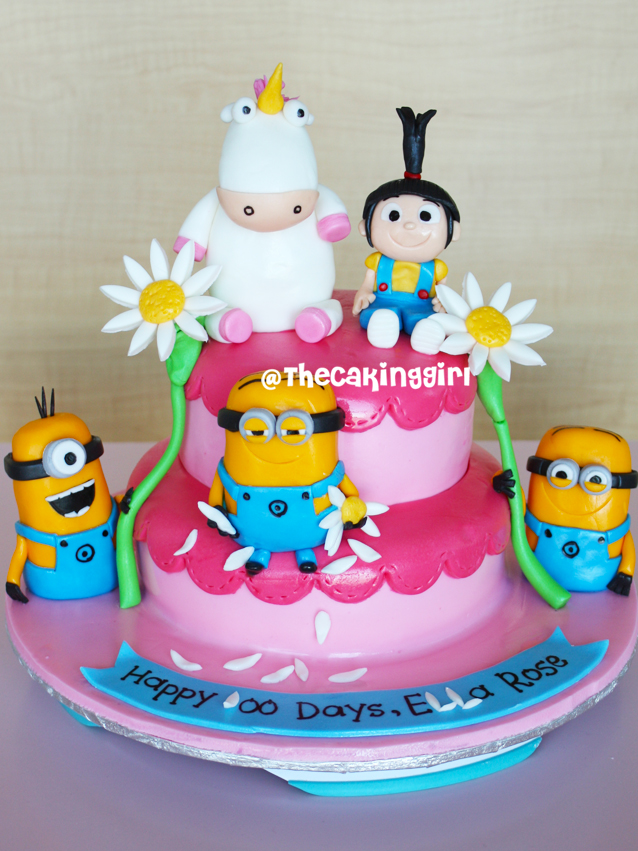
MINIONS! I love them! They were the best part of the Despicable Me movies, so glad they finally have their own movie! I’ve always loved receiving Minion cake orders, hope I get to make some more this year now that their movie is coming out.
This is one of my most popular Despicable Me Minion cake.
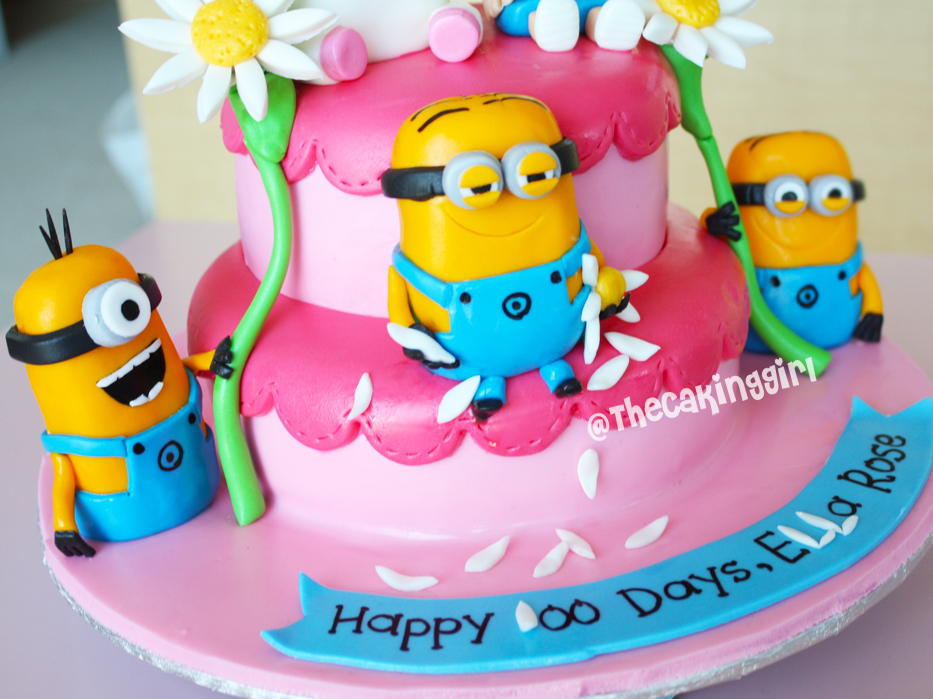
This pink design with the middle minion picking off the daisy petals.
“She loves me, she loves me now”.

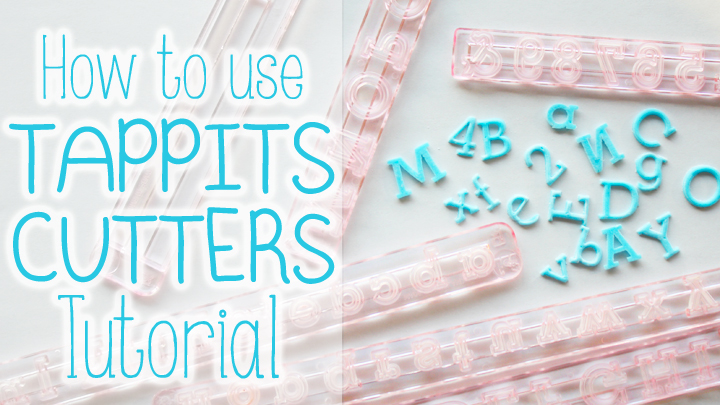
Tappit cutters! Pros… I love the font, some cake designs look better overall with the lowercase or uppercase Tappit cutters. Cons… they can be intimidating to use. Many times I hear from bakers, both beginners and advance, they have trouble using them. I remember wanting to pull my hair out the first time I used them. It happens to all of us!
What makes Tappit cutters challenging to use, is how narrow the fondant letters and numbers are. They can be easily twisted and deformed by the slightest touch while getting them out. With the help of tweezers, exacto knives and toothpicks, it can still be challenging.
I’ve tried many different methods to get the fondant letters out. In this tutorial, I will show you the fastest and easiest way to get the letters and numbers out of the Tappits.
The trick is to have your fondant rolled very thin and let it air dry it a bit. Roll it as thin as you can, and then let it sit for a few minutes. It won’t work if your fondant is too soft or sticky. If you added colouring to your fondant recently, it will take some time for it to air dry. Do not attempt to use it without letting it air dry.
The more stiff and dry the fondant is, the easier it is to remove the fondant letters and numbers from the cutter.

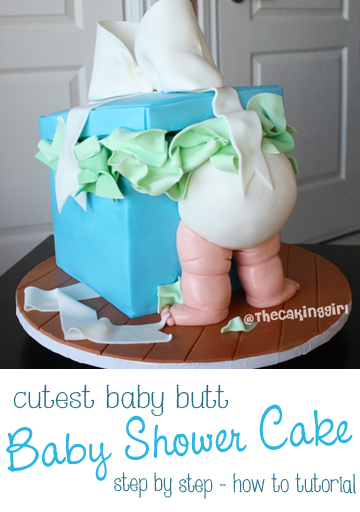
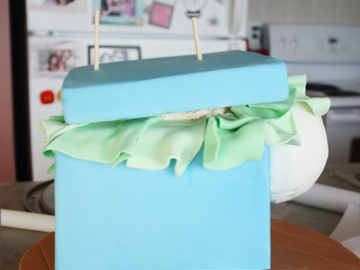
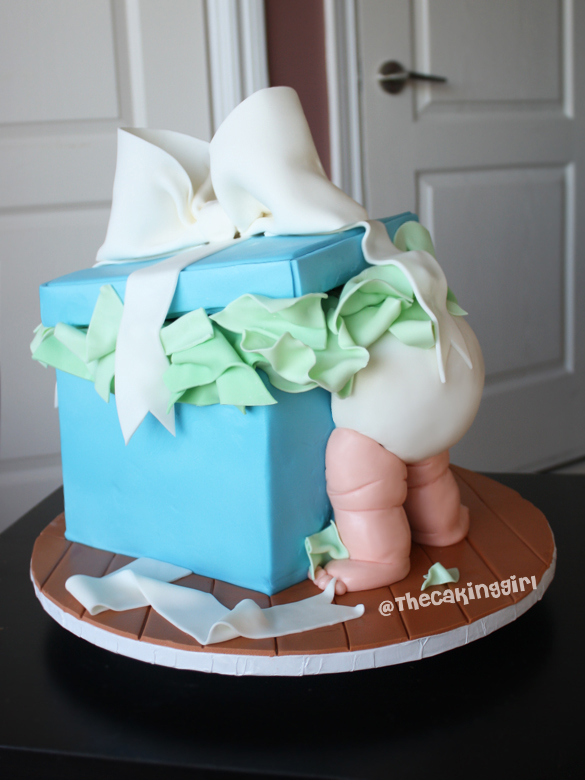
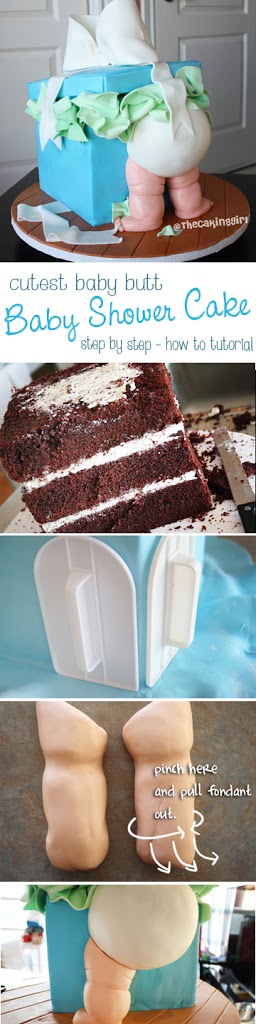
You’ve probably seen this latest baby shower cake trend floating around- the gift box baby butt cake design! Instead of the typical baby butt under a blanket baby shower cake design, this new cake design looks like a baby is rummaging through tissue papers to see what’s in the gift box. Here I will show you how to make his cake design, step by step.
Ok, let’s get started.

I used an 8 inch square pan and baked 3 layers. Including the icing in between and on top of the cake, it came close to 8 inches in height giving it a nice cube gift box shape. This provided 25-30 servings.
Tip: Try to avoid rectangular sheet pans, or square pans bigger than 8 inches, or else you’ll need a lot of cake batter to bake enough layers to get a good height for the cake. If the cake is too short, the baby butt and legs will be very small in proportion to the gift box
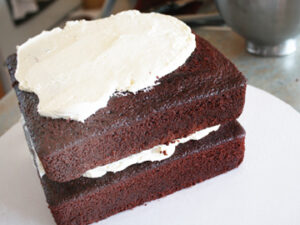
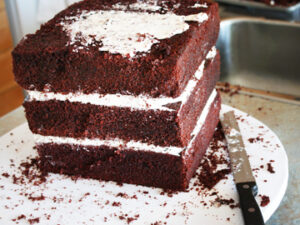
Stack the layers with icing or filling in between. Carve all 4 sides and then ice it with buttercream. Put it in the fridge for it to harden, then ice it again, repeat until you have a cube shape with clean edges.
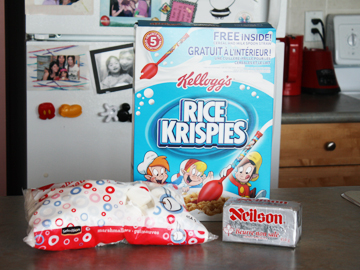
While you’re waiting for the cake to harden in the fridge, you can start making your rice krispies treat, I’m using the rkt for the baby’s butt, gift box’s lid and a brick-size block to fill in space between the box and lid. Rice Krispies Treat Recipe from Kelllog’s: *(I made 1 1/4 batch.)
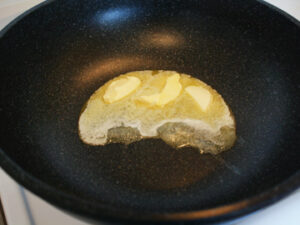
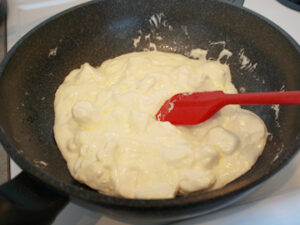
1. In large saucepan melt butter over low heat. Add marshmallows and stir until completely melted. Remove from heat.
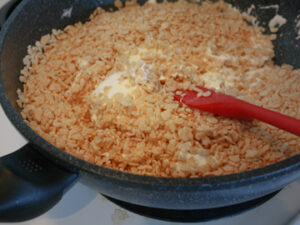
2. Add rice krispies cereal. Stir until well coated.
3. Using buttered spatula or wax paper evenly press mixture into pan.
MICROWAVE DIRECTIONS:
In microwave-safe bowl heat butter and marshmallows on HIGH for 3 minutes, stirring after 2 minutes. Stir until smooth. Follow steps 2 and 3 above. Microwave cooking times may vary.
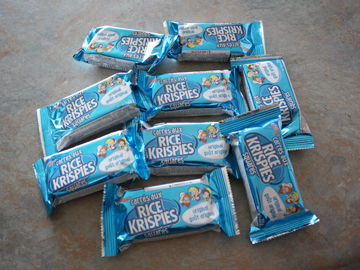
If you don’t want to make your own rkt, you can also buy ready made ones. To soften them for use: take off the wrapper, put them in a bowl, and microwave at 15 seconds intervals until soft.
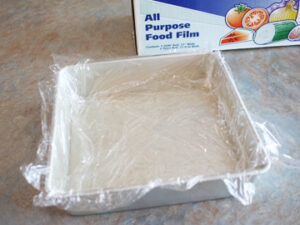
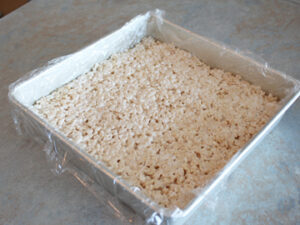
I’m using the same 8 inch square pan I baked with, cleaned it and then covered it with plastic wrap. Wait for the RKT to cool for a few minutes first, it can be too hot and melt the plastic wrap. With a spatula, fill the pan and flatten the RKT as much as you can.
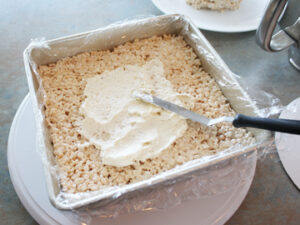

Once the RKT is cooled down and stiffened, add some buttercream on it and stick a cake board to it. You can use a square board, I’m using an 8 inch circular board cause I didn’t have a square one ^^. The RKT at the corner without a board should be fine though, as RKT is light and hard so it won’t break off. Use a square board that would cover the entire surface if you’re making a lid with cake.

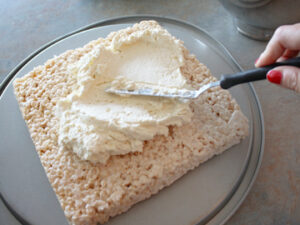
Flip the RKT over, and peel off the plastic wrap. Ice the lid with buttercream to get all the bumps out. Ice it until it’s a smooth flat surface and fridge it to harden. Repeat until it’s smooth, flat with clean edges.
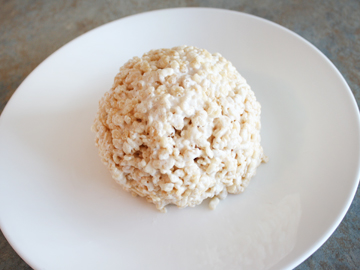
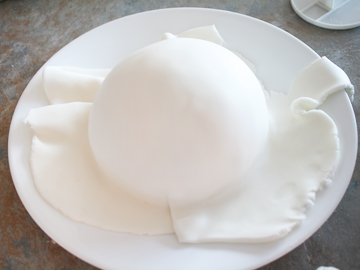
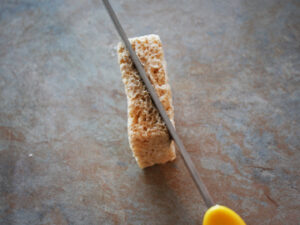
Making a half sphere shape for the butt. I made the RKT baby butt diameter about half the height of the cake. The height of the cake is 8 inches so the butt is around 4 inches. Also, put aside some RKT, make a rectangular bar with it, a little smaller than a brick size. You can use it to fill in some space between the gift box and the lid. (Sorry I didn’t take a picture of this) Tip: I’ve seen some cakes with baby butts too small, make it big and round so it’s cuter that way. It’s cuter when the baby butt is at least the same length as the baby’s legs. If you make the butt smaller, and the legs too long, it wouldn’t look as cute.
 Check and see if the gift box part of the cake is ready to be covered in fondant. Ice it once more if you need to. Leave it in the fridge while you colour your fondant. I’m making light blue for the box, and light green for tissue paper. I let the fondant air out a bit (adding colour gels can make it sticky/wet to work with), before I start using it.
While letting the coloured fondants air out, you can ice the baby butt and lid until they’re finished and ready for fondant.
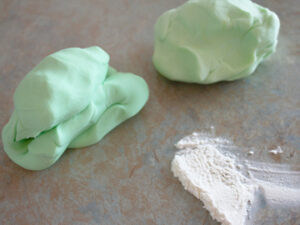
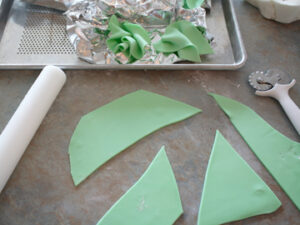
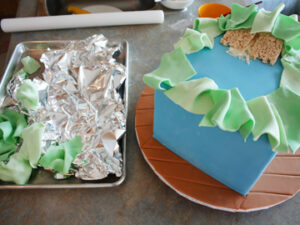
For the tissue paper, I’m using green fondant mixed with gumpaste powder. The gumpaste powder will let it dry/harden faster and allows you to roll it thinly without breaking. Roll it out to almost 1/16th of an inch. Then cut them into random shape pieces. Tip: I made 2 clumps of green, one is slightly darker than the other, it adds a bit of dimension to the appearance.
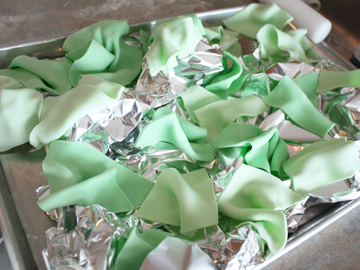
Scrunch up some tin foil and place them onto a tray. Then put the gumpaste pieces over it, scrunch it, fold it etc, so it looks like tissue paper. Let them dry for a few minutes.
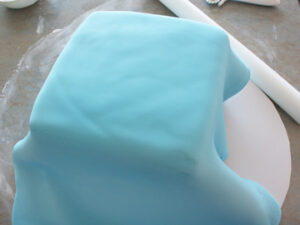
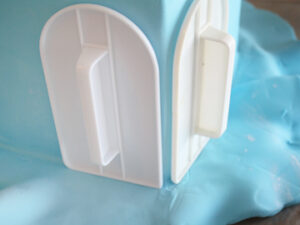
While the tissue papers are drying, I rolled out light blue fondant, at about 1/4 inch thick. To get sharp edges, I used 2 smoothers. If you’re not sure how to make sharp edges on a fondant cake, there are tutorials on Youtube.
Tip: When covering a large/tall cake, after you place the fondant over the top of the cake, use your hands to pat down the border around the top surface (so about 1 inch below the top edge) to secure the fondant on, or else it’ll start to rip/tear.

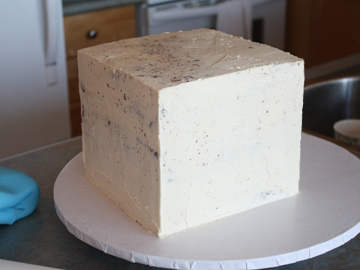
After lots of smoothing, this was the sharpest I could get the edges. Tip: You can also try the panelling method, where you would cut 4 pieces of fondant the exact same square size as one side of the cube, and then panel them up onto the cake individually.
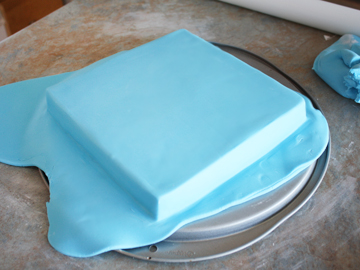
After covering the cake with fondant, also cover the lid with fondant as well.
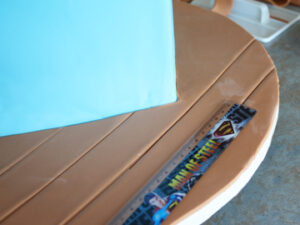
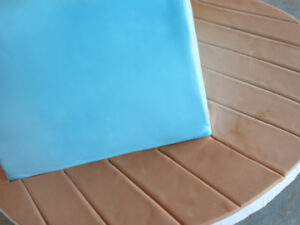
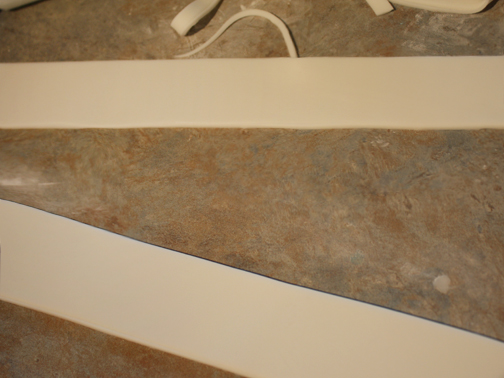
Cover the cake board if you want, or you can leave it bare. I covered it with brown fondant and gave it a hardwood floor pattern. I used a ruler and pressed it into the fondant.
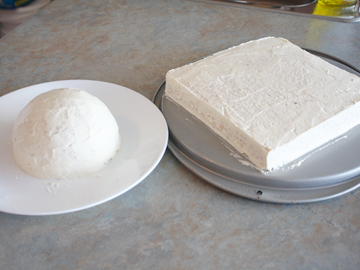
Cover the baby butt RKT with fondant.
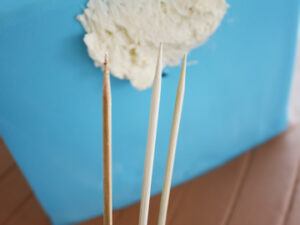
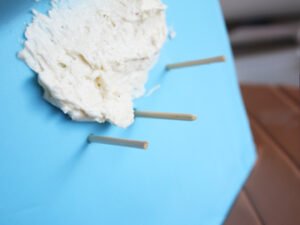
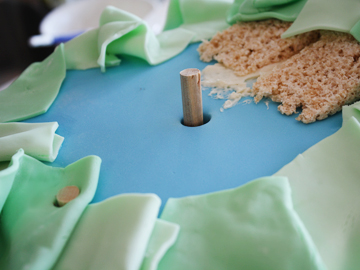
Now I’m gonna stick dowels into the cake, so it can support the baby butt. The wooden dowels I bought have a sharpened end, if your dowels don’t come with a pointed end, you can use a pencil sharpener to sharpen it. I added buttercream there to help the baby butt RKT to stick. I left the dowels to stick out, enough to support the butt but not so much that it would poke through the RKT.
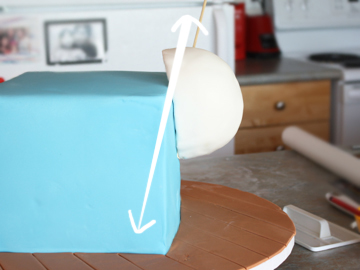
The baby butt is attached to the cake gift box. I also ran another dowel through the butt and into the cake diagonally. I cut the dowel at the top of course.
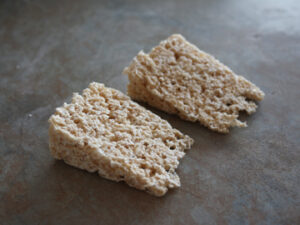
With the rectangular RKT you made earlier, cut it in half so it makes 2 doorstop-looking wedges. This will help fill in some space between the cake gift box and the lid and give it some support as well.
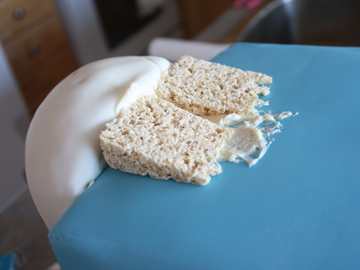
I secured it onto the cake like this with buttercream, near the butt.

And now I can start attaching the tissue paper gumpaste around the top of the box. I used edible glue to secure them on. Don’t use all of it, leave some to use later. Tip: Edible glue = 1/4 tsp tylose powder + 2 Tbs warm water, left overnight in a sealed container.
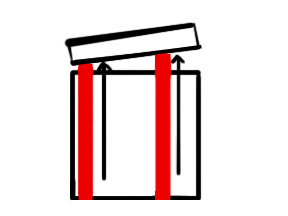
I’ve placed two thicker dowels in the gift box cake to support the lid. One dowel is near the center, and the other one is closer to the edge of the box. You’ll need to place the lid on and carefully take it off, to see where the dowels should be placed, and at what height it should be cut at.
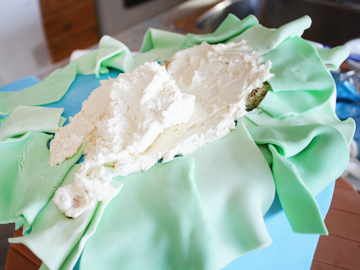
Once both dowels are in place, cover the RKT and dowels with buttercream, and place the lid on.
You’ll notice some gap showing the buttercream, you’ll cover those up with the rest of the tissue paper gumpaste later.
I added two more dowels (with sharp ends so it can poke through the cardboard underneath the lid), and into the cake, so it secures the lid from sliding since it’s slanted on an angle.
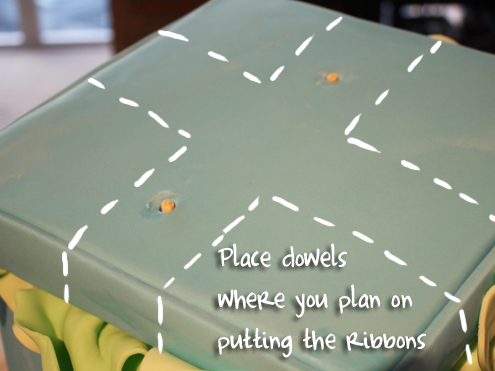
When you place these 2 dowels in, make sure you place it where you can cover it with a fondant ribbon after. Cut the dowels so they are flush with the lid.
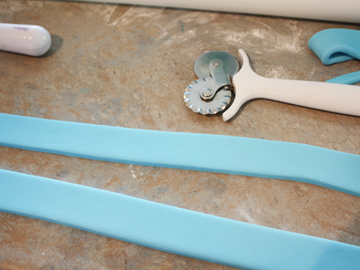
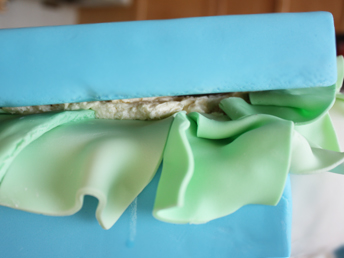
Cut long strips to cover the sides of the lid.
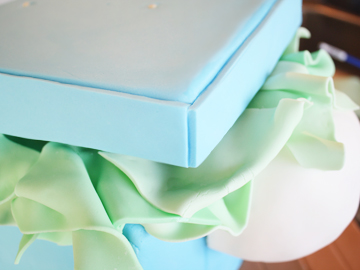
I like adding the strips to the side of the lid, it gives it a more ‘gift box’ look.
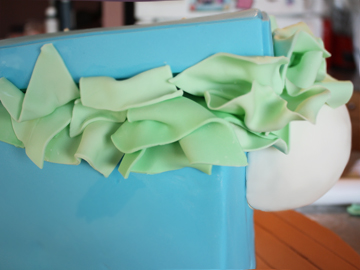
With the rest of the tissue paper gumpaste, fill in the gap on all 4 sides. You don’t want people to see all the structure support inside the cake. Tip: If you are adding the strips of fondant onto the side of the lid, do that first before adding the rest of the tissue paper, it’ll be impossible if you add the rest of the tissue paper, and then add the strip of fondant after. Okay, now we just need the bow/ribbons for the gift box, and the baby legs….. 🙂
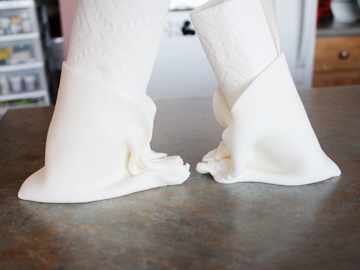
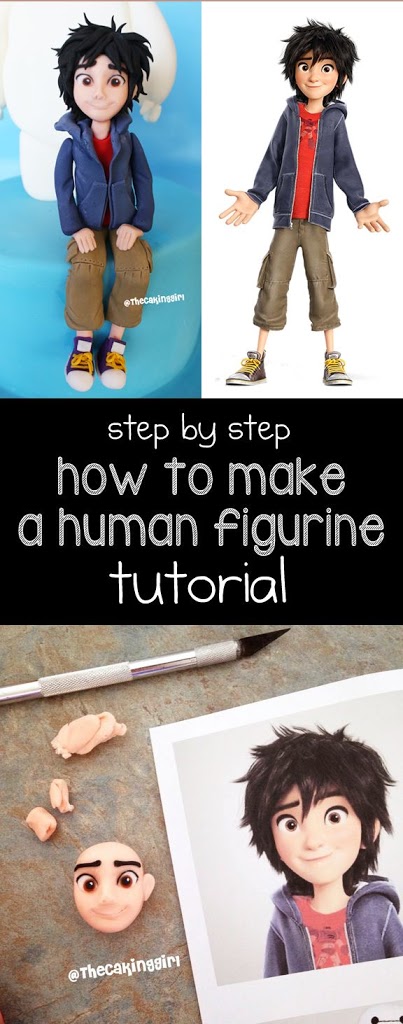
How To Make Cute Baby Legs With Fondant
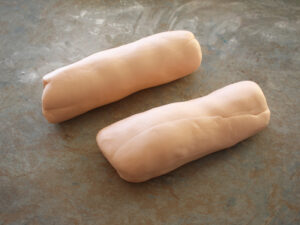
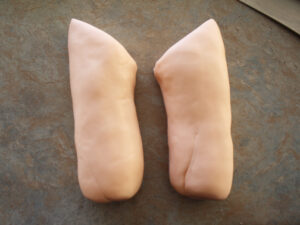
1. Roll the fondant into two long pieces. 2. Cut them on an angle at the top, that’s the part that will attach to the diaper.

3. I used a small rolling pin to indent where the back of the knees are. 4. I used my hands to ‘pull out’ some fondant from the calves, to form the feet. So with my thumb and index finger, I’m forming a C shape, holding the bottom of the legs, I’m ‘pinching/pulling’ fondant out.
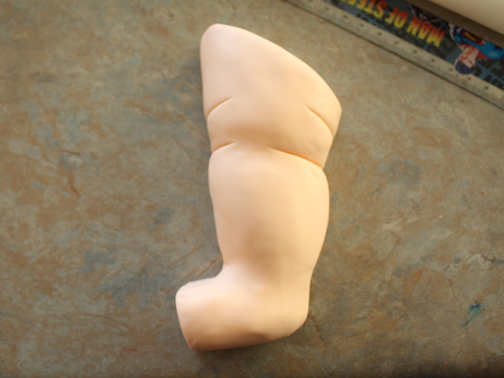
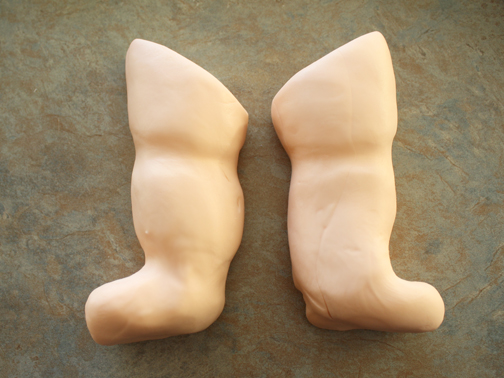
5. With a knife, add some lines for the skin folds. 6. Compress the leg from top to bottom, so it looks pudgier/chubbier.
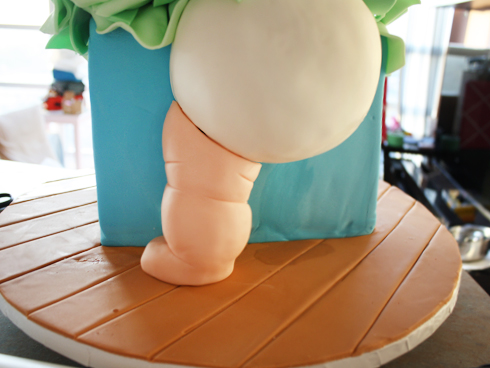
7. Measure the one you made to make sure it fits under the diaper and touches the cake board.

7. Shape the other leg so it’s identical to the one already made.
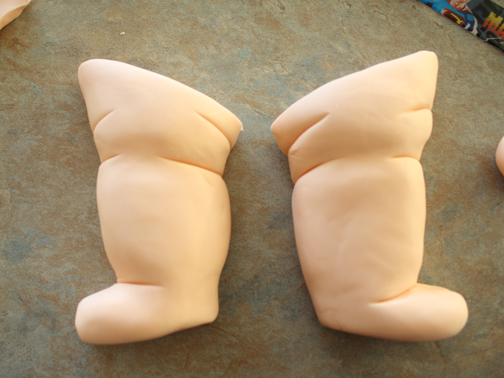
8. Smooth out the legs.
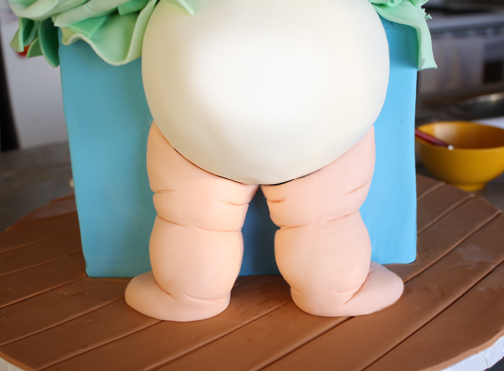
9. Once you like how the legs look, attach them onto the cake with edible glue.
We’re almost finished 🙂
Roll out strips of white fondant, for the ribbon. Make sure to cover where the dowels show on top of the lid.
For the Bow, I added both gum powder and tylose powder for it to dry faster. I’m using parchment paper inside to hold its shape while it dries. Tip: Don’t make the bow too small, make it big enough so it looks proportional to the gift box. I’ve seen some gift box cakes where the bow looks too small and it doesn’t look good.
Glue the bow and ribbons in place.
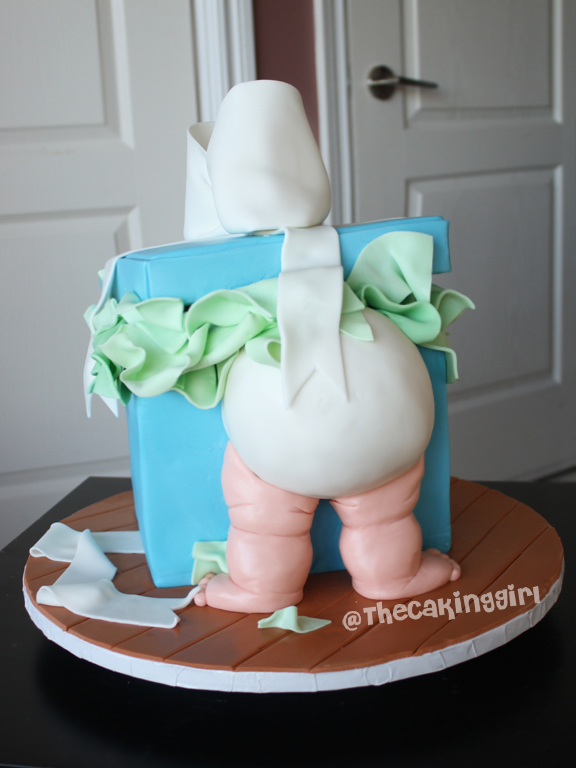
Here’s the finished gift box baby butt cake!
Add a message on the cake if you’d like.
IF YOU ENJOYED THIS POST, PIN IT AND SHARE! 🙂

What You’ll Need
– a mug
– measuring spoons
– spoon
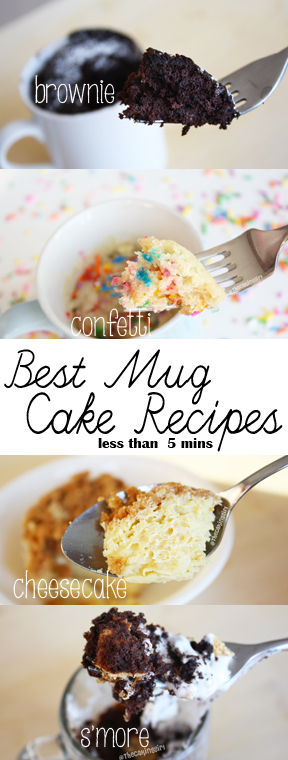
Most recipes call for 1 min on high in the microwave, if the cake is still not baked yet, put it back on high in the microwave at 15 seconds burst until the top of the cake is dry.
Tip: Self-rising flour = 1 cup all purpose flour + 1 1/2 tsp. baking soda + 1/4 tsp. salt
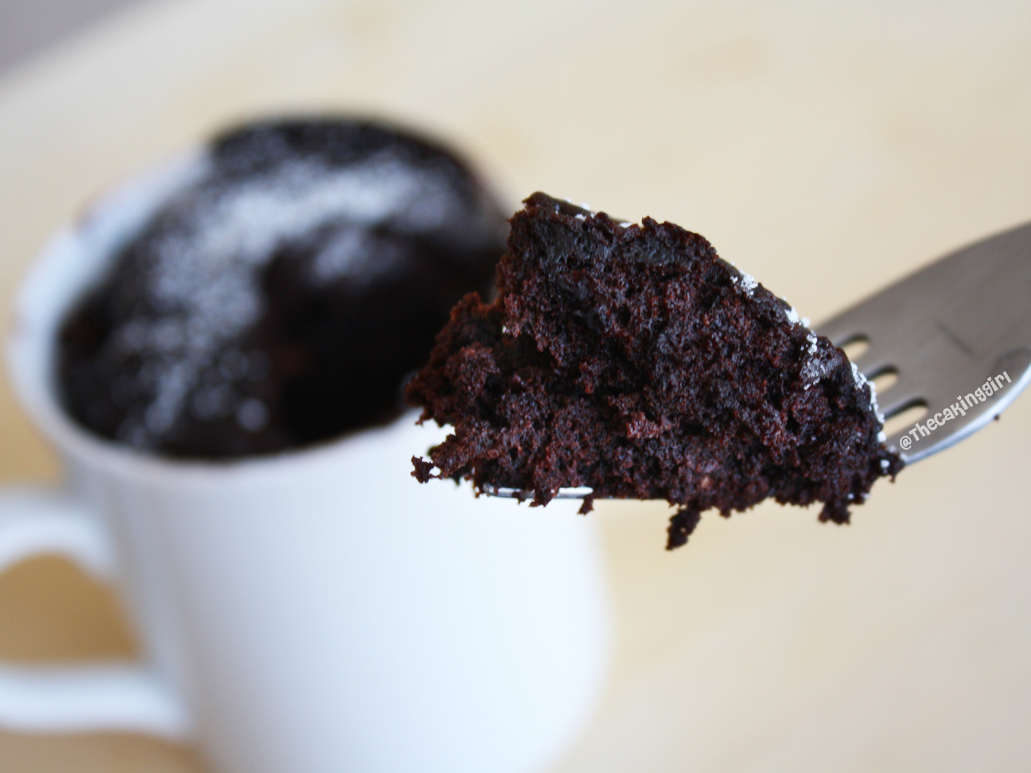
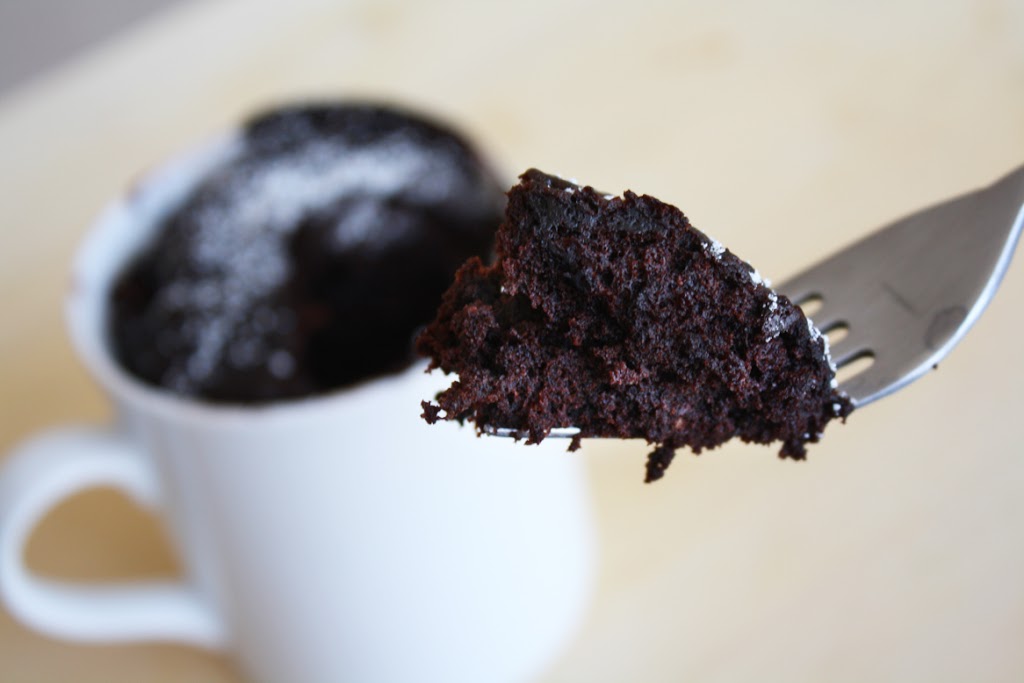
Chocolate Brownie Mug Cake Recipe
4 tbsp. self-rising flour
4 tbsp. sugar
3 tbsp. cocoa powder
2 tbsp. beaten egg
3 tbsp. milk
2 tbsp. vegetable oil
1/2 tsp. vanilla extract
Instructions: Mix the dry ingredients together in a mug. Add egg, milk, oil and vanilla extract. Stir until the batter is smooth and microwave on high for 1 minute.
Red Velvet Mug Cake Recipe
4 tbsp. self-rising flour
4 tbsp. sugar
3 tbsp. cocoa powder
2 tbsp. beaten egg
1 tbsp. red food coloring
3 tbsp. vegetable oil
3 tbsp. buttermilk
Instructions: Misx the flour, sugar and cocoa powder in a mug. Add the egg, food coloring, oil and buttermilk. Stir until the batter is smooth. Microwave on high for 1 1/2 mins.
(Optional) Cream Cheese Frosting:
1 oz. cream cheese, softened
2 tbsp. unsalted butter, softened
1/2 tsp. vanilla extract
1/2 cup powdered sugar
Instructions: Beat the cream cheese and butter with electric mixer until fluffy. Add vanilla and powdered sugar and beat until smooth.
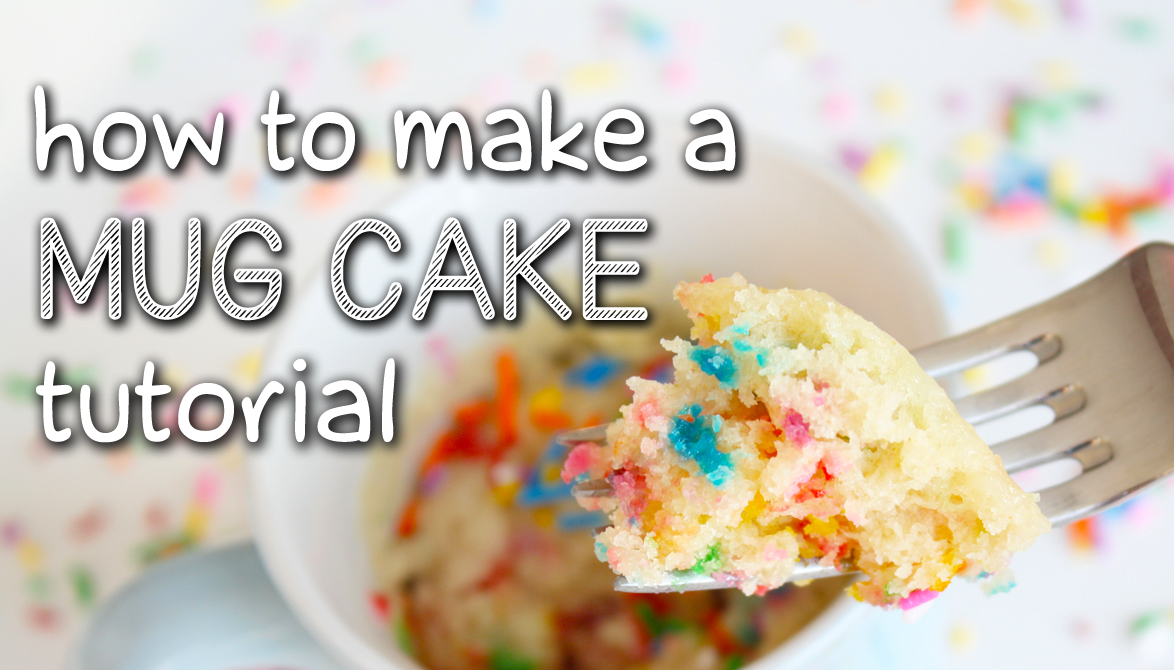
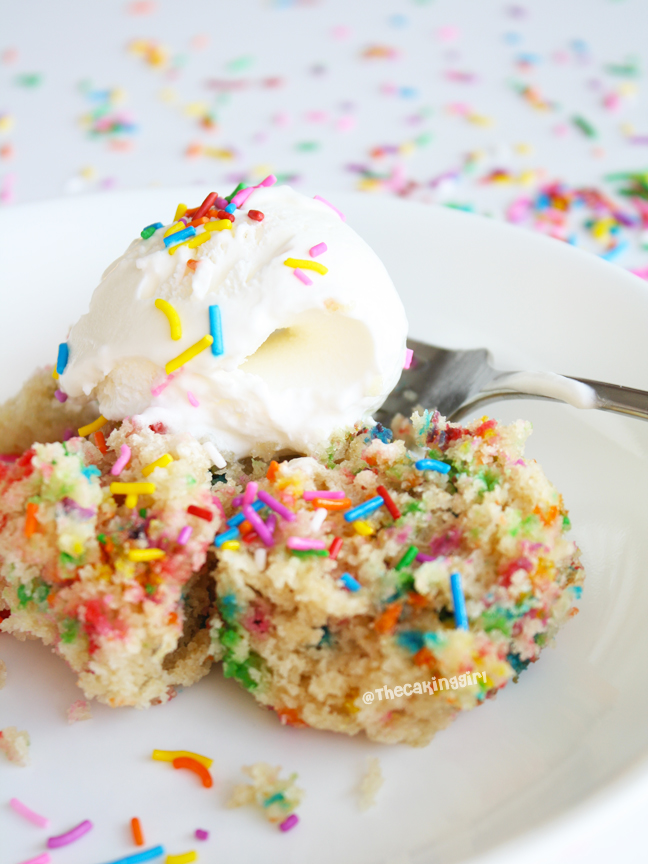
Confetti / Rainbow Sprinkles Mug Cake Recipe
4 tbsp. self-rising flour
4 tbsp. sugar
2 tbsp. beaten egg
3 tbsp. milk
2 tbsp. vegetable oil
1/2 tsp. vanilla extract
2 tbsp. rainbow sprinkles
Instructions: Mix the flour and sugar in a mug. Add the egg, milk, oil and vanilla mix it altogether. Stir in the sprinkles. Microwave on high for 1 min.
Peanut Butter Mug Cake Recipe
4 tbsp. self-rising flour
4 tbsp. sugar
2 tbsp. beaten egg
3 tbsp. peanut butter
3 tbsp. milk
1 tbsp. vegetable oil
2 tbsp. marshmellow fluff
Instructions: Mix the flour and sugar in a mug. Then add the egg, peanut butter, milk and oil and stir. Microwave on high for 1 1/2 min. Add marshmellow fluff on top of cake afterwards.
Chocolate Salted Caramel Mug Cake Recipe
4 tbsp. self-rising flour
4 tbsp. sugar
3 tbsp. cocoa powder
2 tbsp. beaten egg
3 tbsp. milk
2 tbsp. vegetable oil
1/2 tsp. vanilla extract
2 tbsp. varemel sauce or 1 oz. solid caramel, melted
sea salt
Instructions: Mix the dry ingredients in a mug. Then add egg, milk, oil and vanilla and stir until well combined. Swirl in the caramel sauce on top, and sprinkle with sea salt. Microwave on high for 1 min.
Vegan Coconut Mug Cake Recipe
4 tbsp. self-rising flour
2 1/2 tbsp. sugar
4 tbsp. full-fat coconut milk
1/2 tsp. vanilla extract
1 tbsp. sweetened shredded coconut
Instructions: Mix flour and sugar in a mug. Add the coconut milk and vanilla and stir. Stir in the coconut. Microwave on high for 1 min.
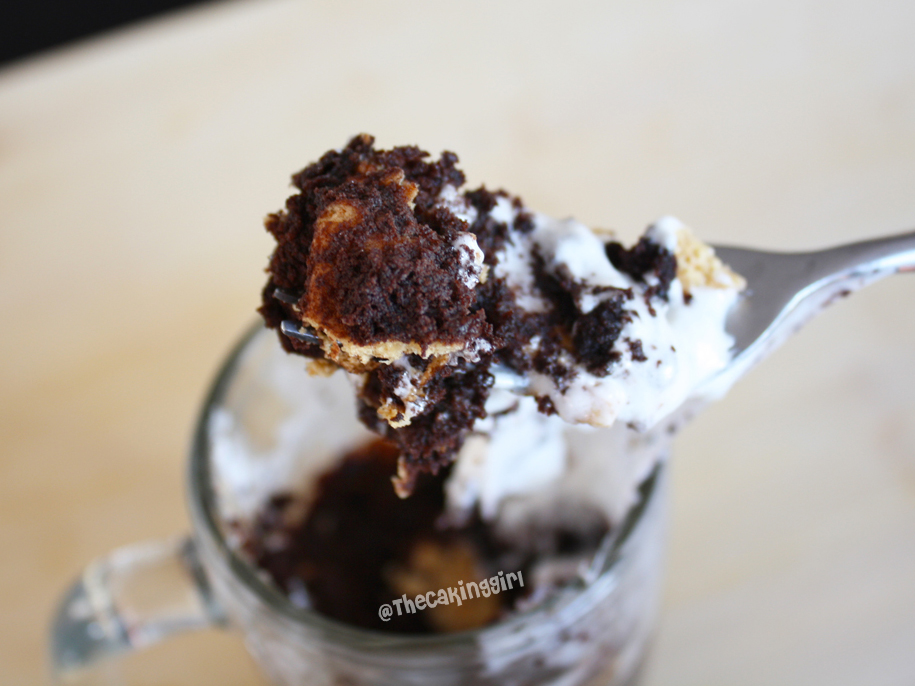
S’More Mug Cake Recipe
4 tbsp. self-rising flour
4 tbsp. sugar
3 tbsp. cocoa powder
2 tbsp. beaten egg
3 tbsp. milk
2 tbsp. vegetable oil
1/2 tsp. vanilla extract
2 graham crackers, broken into pieces
handful of mini marshmellows
Instructions: Mix the flour, sugar and cocoa powder into a mug. Then add the wet ingredients and mix well. Shove the graham crackers into the batter and try to distribute them evenly. Add the marshmellows on top. Microwave on high for 1 min.
Apple Cinnamon Mug Cake Recipe
4 tbsp. self-rising flour
4 tbsp. brown sugar
1/4 tsp. cinnamon
3 tbsp. applesauce
2 tbsp. milk
2 tbsp. vegetable oil
cinnamon sugar
Instructions: Mix the flour, sugar and cinnamon in a mug. Add the applesauce, milk and oil and stir until well combined. Sprinkle cinnamon sugar on top. Microwave for 1 minute on high.
Pumpkin Spice Mug Cake Recipe
4 tbsp. self-rising flour
4 tbsp. brown sugar
1/4 tsp. cinnamon
pinch of ground cloves
1/4 tsp allspice
2 tbsp. canned pumpkin puree
3 tbsp. milk
2 tbsp. vegetable oil
1/2 tsp. vanilla extract
Instructions: Mix the flour, sugar, cinnamon, cloves, and allspice in a mug. Add the pumpkin, milk, oil and vanilla and stir until the batter is smooth. Microwave on high for 1 min.
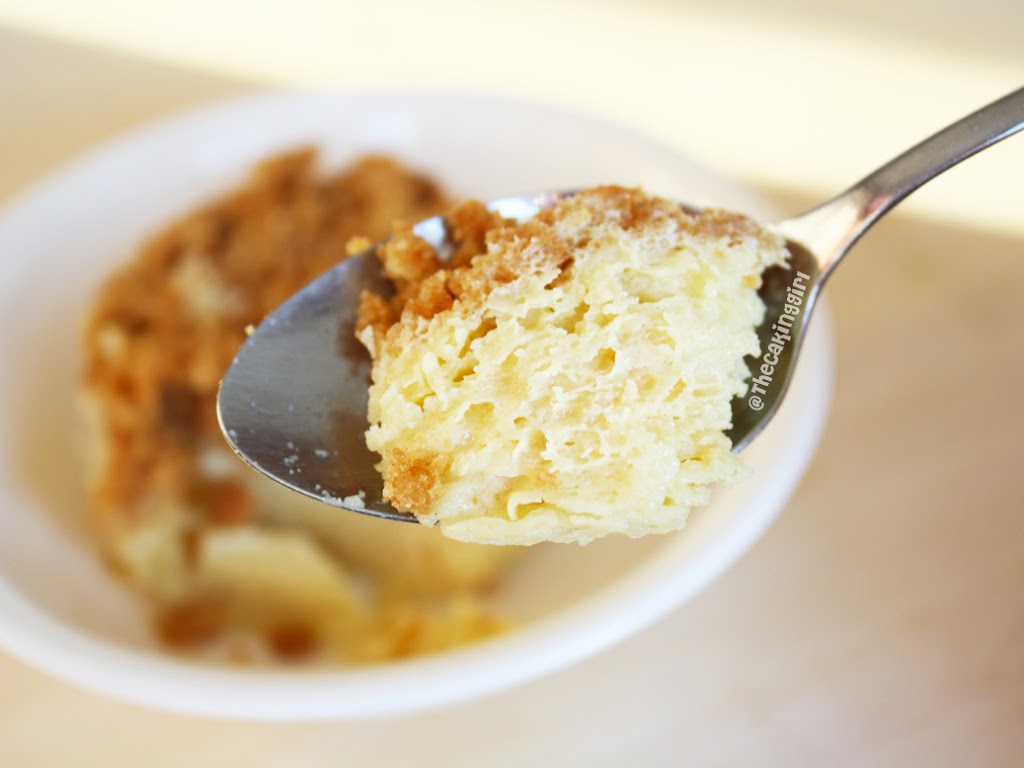
Cheesecake Mug Cake Recipe
Crust:
2 graham crackers, crushed into crumbs
1 tsp. sugar
1 tbsp. melted butter
Cake:
4 tbsp. cream cheese
2. tbsp. plain Greek yogurt
2 1/2 tbsp. sugar
1 egg
1/2 tsp. vanilla extract
Instructions: Crush the 2 graham crackers in a Ziploc bag. Pour it back into a mug and mix in the other 2 ingredients. Pack it as tight as possible at the bottom of the mug. Add all the cake ingredients in a different mug and stir until the batter is smooth. Pour into the cup with the crust. Microwave on high for 2 1/2 mins.


1. Roll the gumpaste into an oval shape, use the side of the mini rolling pin or your finger, to push the top smaller so you have the bottom part wider as the hippo’s nose and mouth.


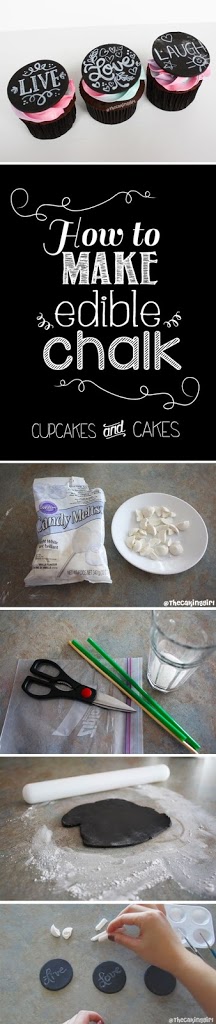
Learn how to make edible chalk for a chalkboard design for cookies, cupcakes and cakes in my new tutorial video. The first two methods will require Wilton Candy Melts in bright white color. The third method will require white food coloring (the brand Americolor makes white food coloring).

IF YOU LIKE THIS,
PIN IT AND SHARE IT!

 |
| How to make Ninja Turtle figurine Tutorial |
 |
| How to make Ninja Turtle figurine. |
